
Puzzle and logic Game guide
Quay Shift: open the gate with the blue service van
Courier A is at the exit, but Dispatch still says gate shut. Park blue van B in its bay, then try this ten-move Service call solution in Quay Shift.
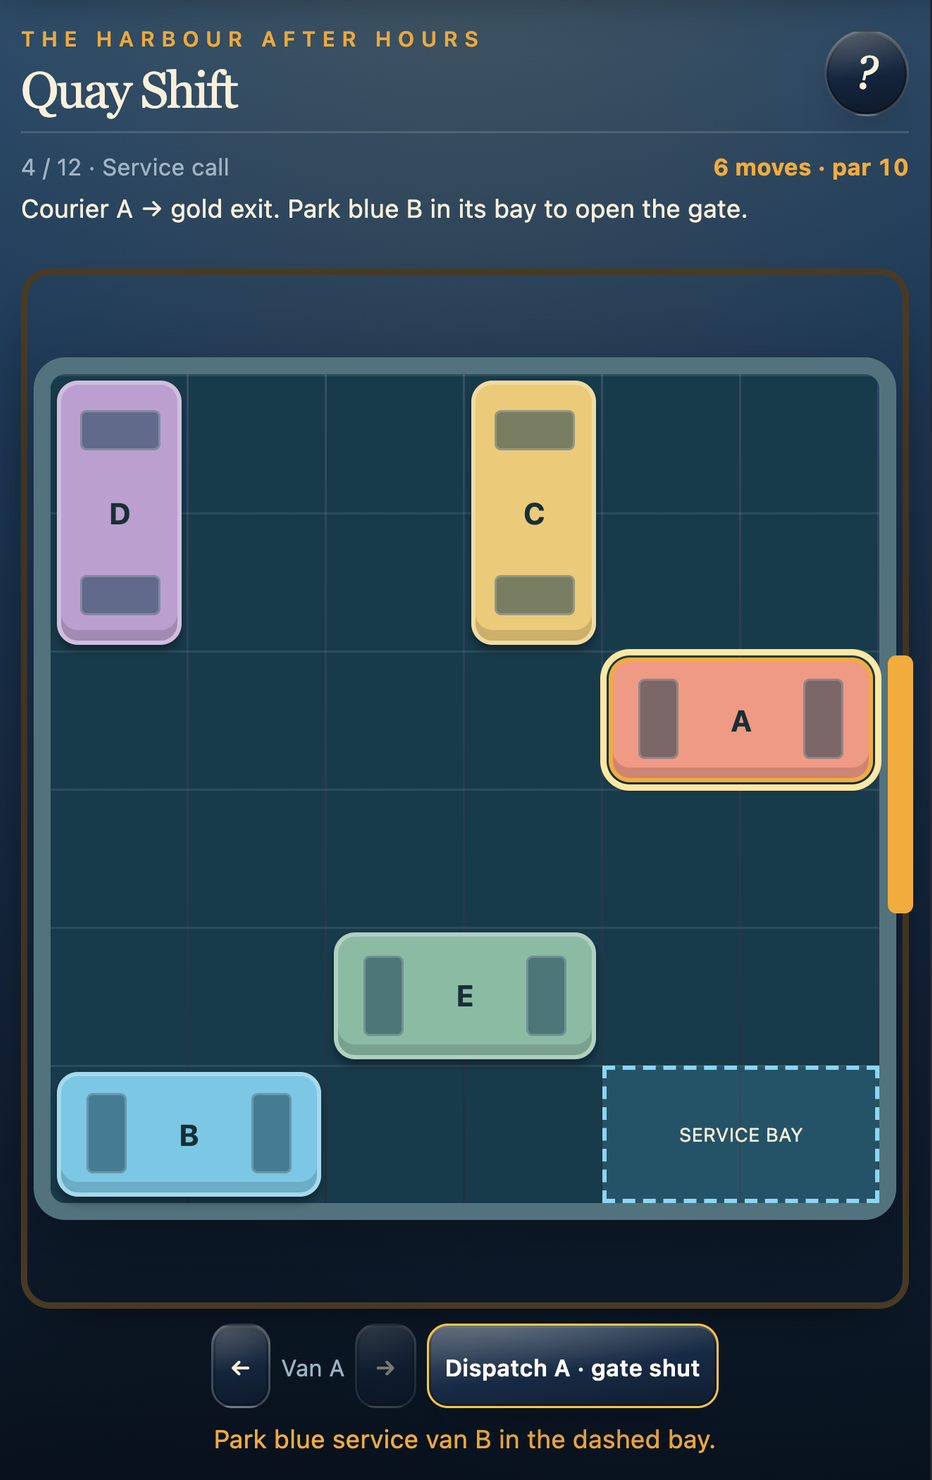
In Quay Shift, getting coral courier A to the right edge isn’t always enough. From Service call, the fourth challenge, blue service van B must also be parked in the dashed blue bay at the bottom right. It holds the exit open while you dispatch A.
If the button says Dispatch A · gate shut, check B before moving the courier again. A can already be in the correct place, as it is in the screenshot above.
Move B all the way into its bay
Select a van, then use the arrow buttons to move it one square at a time along its lane. Keyboard arrows work too: left and right for horizontal vans, up and down for vertical ones. A van can’t turn or move through another van.
B needs to occupy both squares of the service bay. Moving it near the bay doesn’t open the gate. Once it’s fully parked, the gate shut wording disappears from Dispatch. Then, with A at the gold exit, press Dispatch A to finish. Reaching the edge doesn’t finish the challenge automatically.
Clear Service call in ten moves
Open Challenges and choose 04 Service call. This walkthrough starts from its untouched board. If you’ve already moved vans, use Restart and confirm it first.
- Select yellow van C, which blocks A’s row. Move it up twice. C is now against the top edge, leaving the courier’s row clear.
- Select coral A. Move it right four times, until it sits beside the gold exit. The counter reads 6 moves · par 10. Dispatch will still refuse because B hasn’t moved.
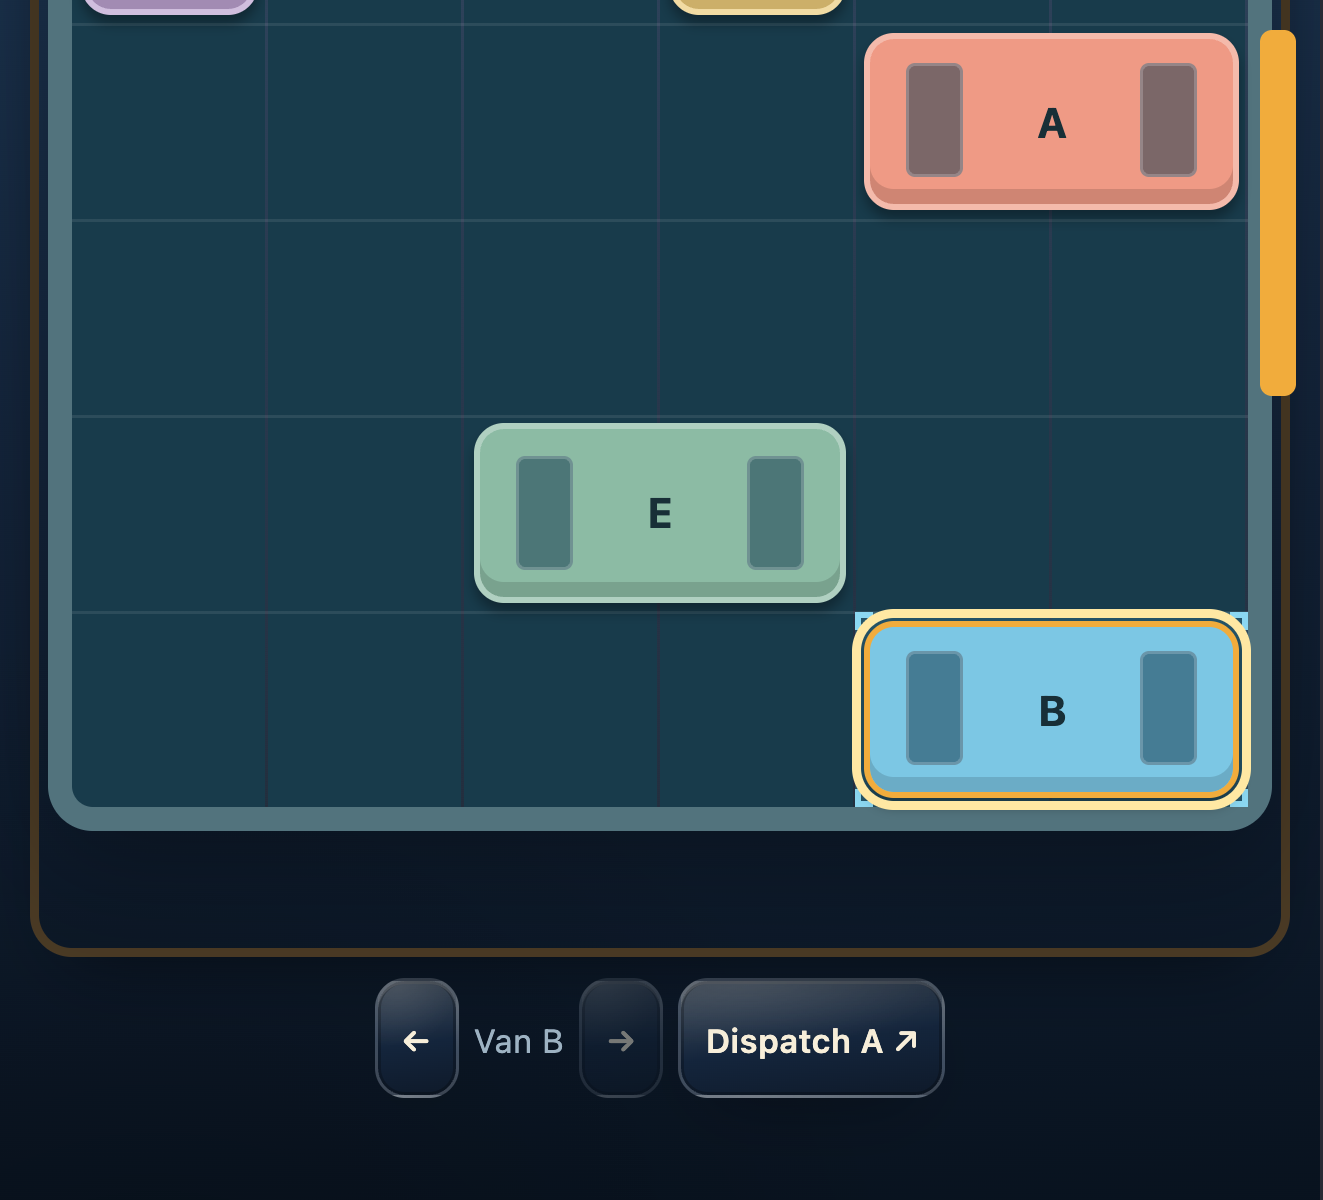
- Select blue B at the bottom left. Move it right four times into the dashed bay. The counter reaches 10 moves · par 10.
- Press Dispatch A. The result confirms a ten-move finish and Dockmaster precision. Dispatch itself adds no move.
D and E can stay where they started. There’s no need to clear every van from the dock, only the lanes A and B need.
Keep B parked until you dispatch
The bay isn’t a switch you activate once. B has to remain there. In this example, pressing Undo after parking B puts it one square left of the bay, takes the counter back to nine and closes the gate again. Select B and move it right once to restore the ten-move position.
Undo is useful for trying a route without keeping every detour in your move count. Before rearranging several vans, check which lane is actually blocked and whether B still has a route to its bay. Later docks use the same gate requirement, but their traffic needs a different sequence.