
Strategy and tactics Game guide
Thornfield Tactics: protect a hamlet with Ward
Use Ward to stop a threatened hamlet taking a hit in Thornfield Tactics. Try a first-turn example, read the attack marks and see why one shield is not enough.
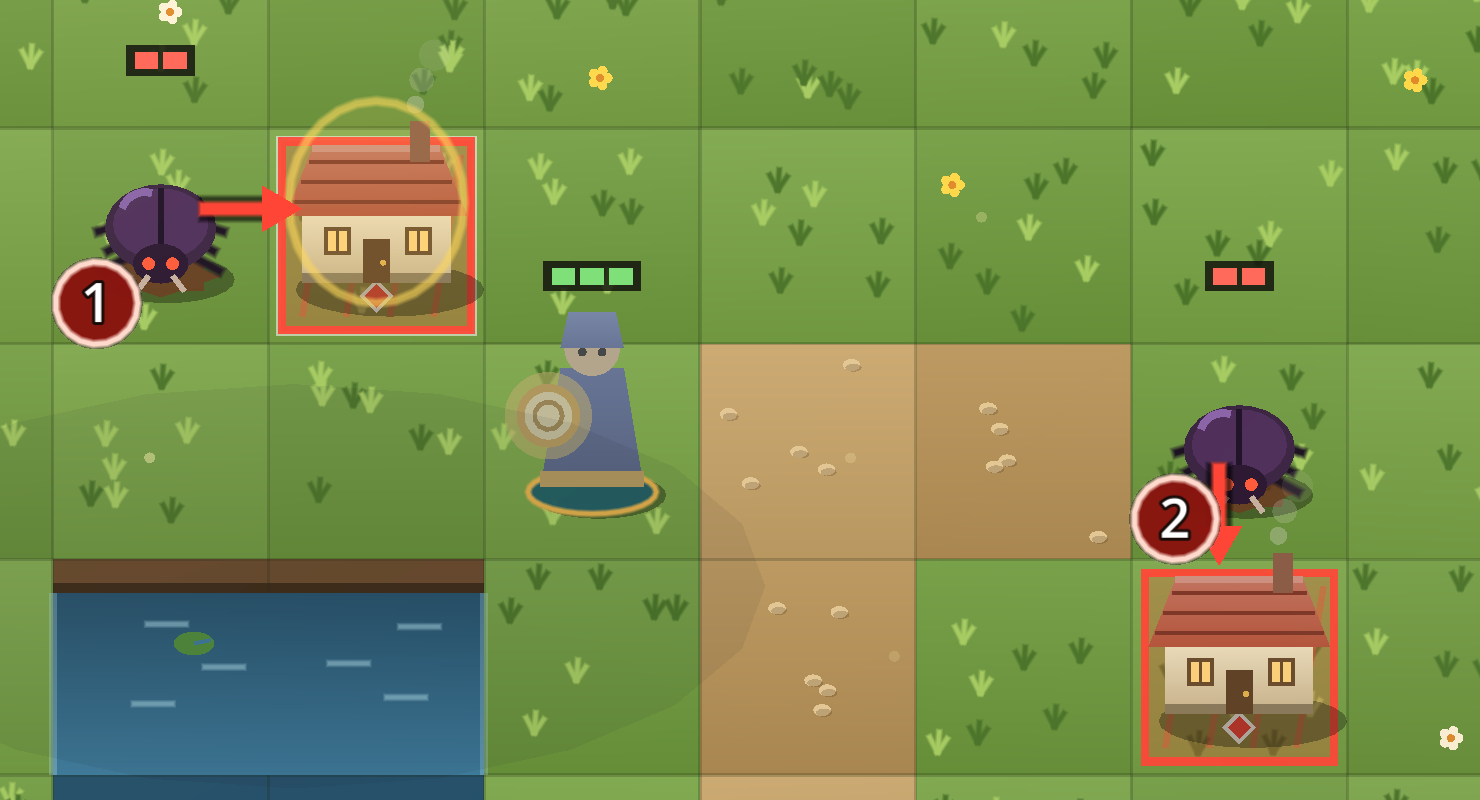
In Thornfield Tactics, Ward lets the Warden shield a hamlet before a beast strikes it. The shield absorbs one hit, then disappears. It doesn’t kill the attacker, change its aim or protect the other cottages.
That makes Ward useful when a threatened hamlet is within reach but you aren’t removing the threat this turn. Read the red attack marks first, choose what to protect, then check the rest of the field before pressing End turn.
Put the hamlet within reach
Each of your three units can move once and act once per turn. Move before using the action: acting also ends that unit’s movement. The Warden starts with Ward selected and can protect a friendly unit, a standing hamlet or a well within two orthogonal steps. Count horizontal and vertical steps, not diagonal squares.
A nearby cottage can therefore be out of range until you move the Warden. Select the unit, choose a blue movement tile, then look for the orange-marked targets. Undo can take back a move before an action; it isn’t a way to undo a shield you’ve already cast.
On desktop, click the target to cast Ward. With touch, the first target tap previews the action and the second commits it. Look for the gold shield around the cottage to confirm the cast.
Try the opening in First Muster
Start a fresh Easy campaign and begin First Muster in Meadowmere. Two beetles threaten different hamlets on turn one. The numbered arrows show the order in which those attacks will resolve.
For this example, count columns from the left and rows from the top, starting at one:
- Select the Warden, the blue-robed unit with a round shield at column 4, row 5.
- Move two tiles straight up to column 4, row 3.
- Use Ward on the upper-left hamlet at column 3, row 2. It’s one step left and one step up from the Warden.
- Check the gold ring. The beetle’s red arrow still points at that hamlet, which is expected: the attack hasn’t been redirected.
The screenshot above shows the committed shield, not just a preview. The Warden has spent its action; the other two units are still available.
One shield leaves other threats unresolved
To show exactly what Ward does, our example ended the turn without acting with the other units. The shielded hamlet survived and its gold ring vanished. The unprotected hamlet on the right was destroyed, taking Easy’s Hearth from eight to seven. This is a demonstration of one defensive action, not a recommended full opening turn.
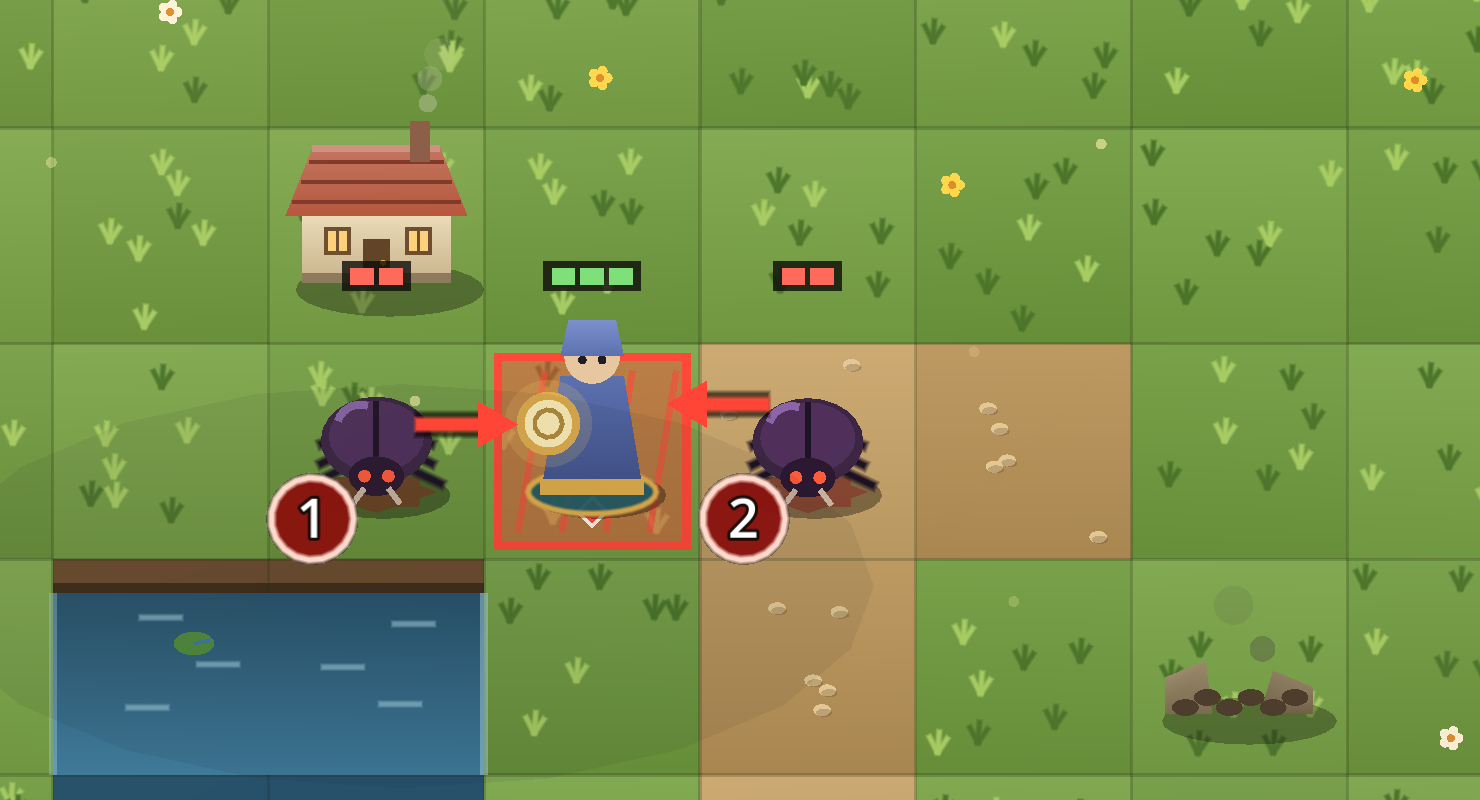
Don’t read a gold ring as permission to stop checking. Ward absorbs one hit, so another hit can still hurt the same target after the shield is gone. Nor does the shield clear the board: in this example the surviving beetles threaten the Warden on turn two.
Before ending your own turn, follow every remaining red mark to its destination. A shield answers one threat. Your next decision is what the other units can do about the rest.